当前越来越多的企业都有使用 Linux 系统桌面的场景,本篇文章以 Ubuntu 20.04.4 和 18.04.5 为例,通过给资产安装 xrdp 服务端,实现 JumpServer 远程登陆 Ubuntu 桌面。
概述当前越来越多的企业都有使用 Linux 系统桌面的场景,本篇文章分别介绍了 XRDP 在 Ubuntu 22.04, 20.04.4 和 18.04.5 的安装方式,以及如何通过配置 XRDP 服务,实现 JumpServer 远程登陆 Ubuntu 桌面。
实现方案一、安装并启动 xrdp1.1 安装 xrdpUbuntu 的安装源里包含 xrdp,可以直接安装。
1 Ubuntu 22.04 安装方式#更新软件包列表:sudo apt update#安装xrdp:sudo apt install xrdp#如果你正在使用GNOME桌面环境,可能需要安装一个兼容的会话管理器:sudo apt install xorgxrdp#安装后,查看当前xrdp版本:xrdp -vxrdp 0.9.172 Ubuntu 20.04.4 安装方式# 检查可安装程序sudo apt list | grep xrdpxorgxrdp/focal,now 1:0.2.12-1 amd64xrdp/focal,now 0.9.12-1 amd64 # 安装sudo apt install xrdp -y # 当前版本为 0.9.12xrdp -vxrdp 0.9.123 Ubuntu 18.04.5 安装方式# 直接安装 xrdp 会导致远程后蓝屏,需要配合其他组件一起安装# 如果已经安装过 xrdp 和 tightvncserver 需先卸载,然后重启系统# 如果安装报错:E: Unable to locate package xxx,执行 sudo apt-get update 后重试sudo apt-get purge xrdp -ysudo apt-get purge tightvncserver -ysudo reboot # 安装sudo apt-get install xserver-xorg-core -ysudo apt-get install xserver-xorg-input-all -ysudo apt-get install xrdp -ysudo apt-get install xorgxrdp -y # 当前版本为 0.9.8xrdp -vxrdp 0.9.81.2 启动 xrdp配置文件是 /etc/xrdp/xrdp.ini 一般不需要修改,日志输出在 /var/log/xrdp.log 和 /var/log/xrdp-sesman.log。
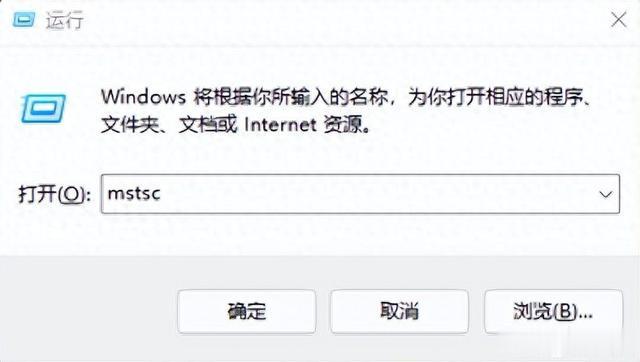
# 默认情况下,xrdp 使用/etc/ssl/private/ssl-cert-snakeoil.key# 它仅仅对 ssl-cert 用户组成员可读,所以需要运行下面的命令,将 xrdp 用户添加到这个用户组sudo adduser xrdp ssl-cert # 启动sudo systemctl start xrdp # 设置开机自启动sudo systemctl enable xrdp # 检查监听端口 sudo ss -nlpt | grep 3389LISTEN 0 2 *:3389 *:* users:(("xrdp",pid=861,fd=11))二、mstsc 连接验证安装好以后可以使用 windows 自带的 mstsc 连接测试。 在开始菜单打开运行,输入 mstsc 点击确定。
配置防火墙开放 3389 端口。
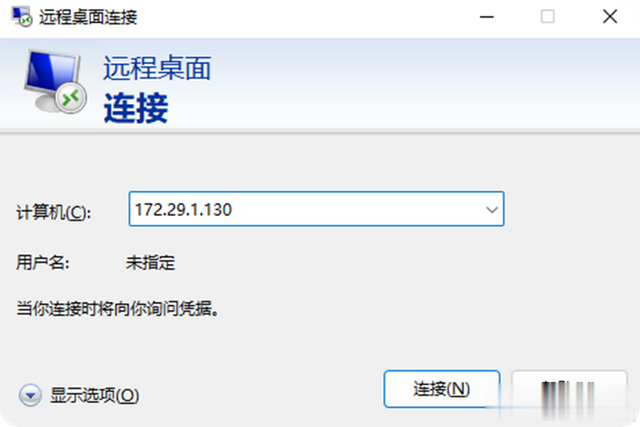
sudo ufw allow 3389/tcp输入ip地址,默认端口 3389,点击连接。
证书错误,选择仍要连接。

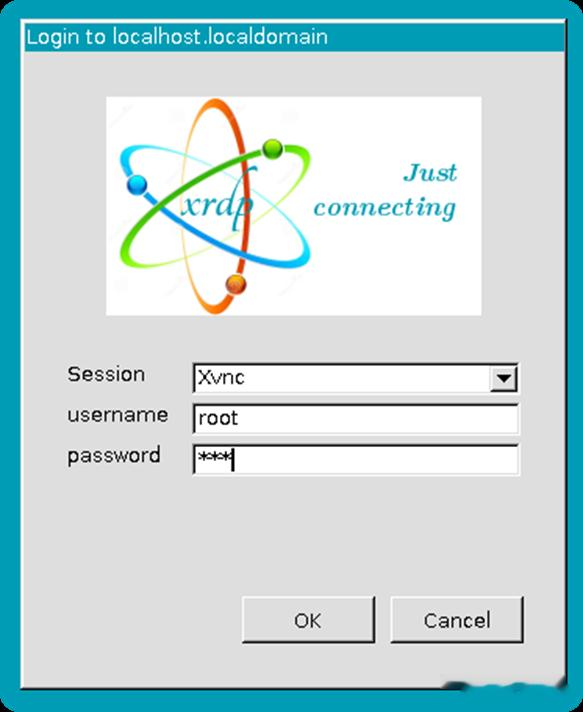
输入用户名密码,点击 OK。
等待连接成功。
 三、JumpServer 配置远程连接
mstsc 验证没问题后就可以配置堡垒机进行远程纳管。
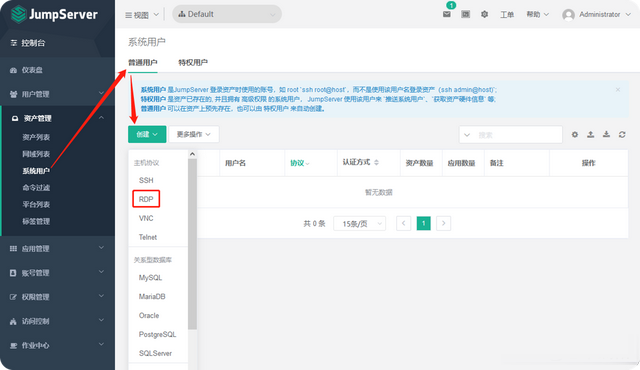
3.1 创建资产、系统用户和授权规则1 创建资产依次点击<资产管理><资产列表><创建>,创建资产时注意要有 rdp 的协议。
 2 创建系统用户
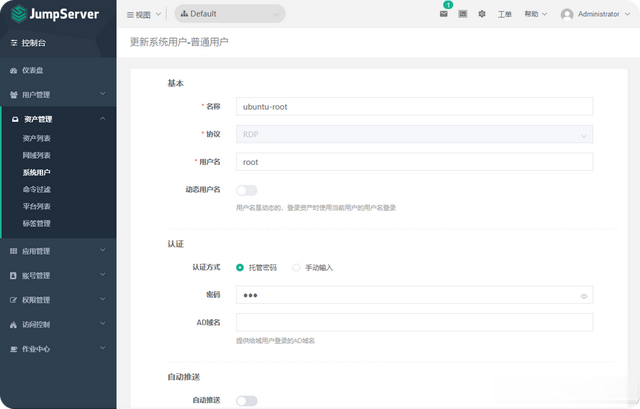
依次点击<资产管理><系统用户><普通用户><创建>,选择 RDP 协议的用户。
确认协议为 RDP。
 3 创建授权规则
依次点击<权限管理><资产授权><创建>。授权规则里选择刚才创建的资产和系统用户。

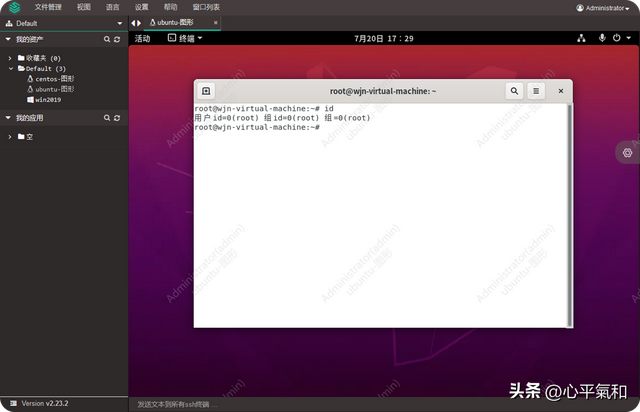
 3.2 登陆1 使用 Web GUI 方式登陆
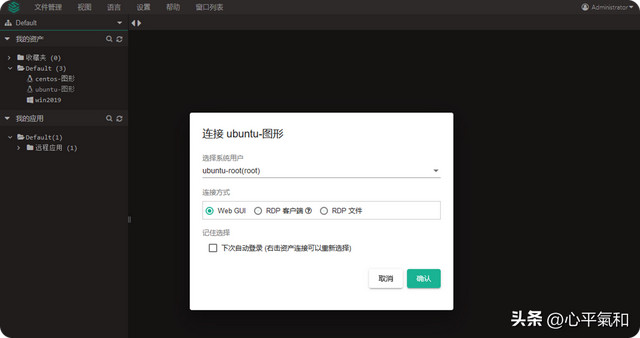
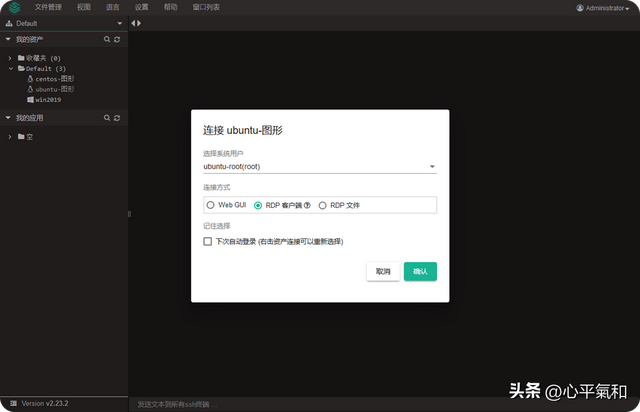
 2 使用 RDP 客户端登陆
注意!目前此种连接方式无法进行监控,并且无法进行录像!
 四、解决已知问题4.1 连接后黑屏# 修改 /etc/xrdp/startwm.sh 文件,在下图的位置加入这两行unset DBUS_SESSION_BUS_ADDRESSunset XDG_RUNTIME_DIR # 重启生效sudo systemctl restart xrdp
 4.2 解决登陆时还需要再输入一遍密码的问题
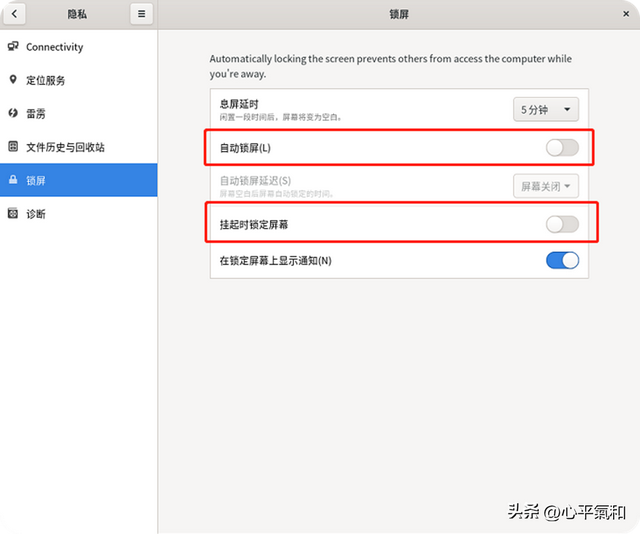
图形界面会自动锁屏,登陆时xrdp已经验证了一遍,但锁屏后还会要求再输入一遍密码。解决方式是关闭自动锁屏。注意!关闭锁屏要在远程的界面操作。
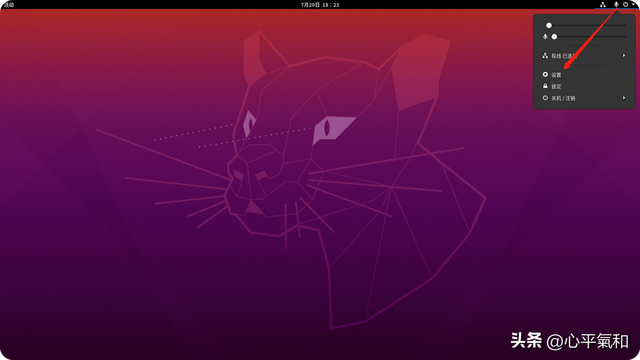
打开隐私设置。
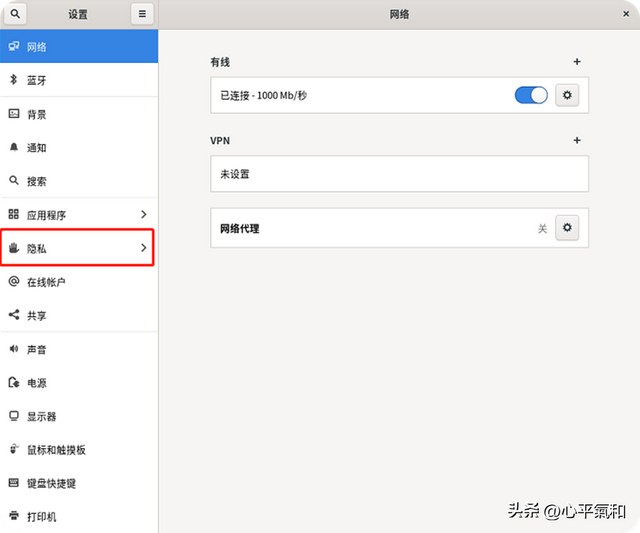
关闭自动锁屏功能。
 4.3 解决普通用户远程登陆时提示认证的问题
描述信息一般是: 需要授权来创建色彩管理设备 / Authentication is required to create a color managed device 需要授权来移除色彩管理设备 / Authentication is required to remove a color managed device 刷新系统软件源需要认证 / Authentication is required to refresh the system repositories
解决方法,创建文件 /etc/polkit-1/localauthority/50-local.d/45-allow-colord.pkla 并写入下面内容。
[Allow Colord all Users]Identity=unix-user:*Action=org.freedesktop.color-manager.create-device;org.freedesktop.color-manager.create-profile;org.freedesktop.color-manager.delete-device;org.freedesktop.color-manager.delete-profile;org.freedesktop.color-manager.modify-device;org.freedesktop.color-manager.modify-profileResultAny=noResultInactive=noResultActive=yes删除 /var/crash/ 目录下的所有文件,然后重启服务器。
4.4 解决 root 账户登录图形界面失败的问题1 修改 gdm 配置修改 /etc/pam.d/gdm-autologin,注释掉第三行,# auth required pam_succeed_if.so user != root quiet_success。

修改 /etc/pam.d/gdm-password,注释掉第三行,# auth required pam_succeed_if.so user != root quiet_success。

2 修改profile
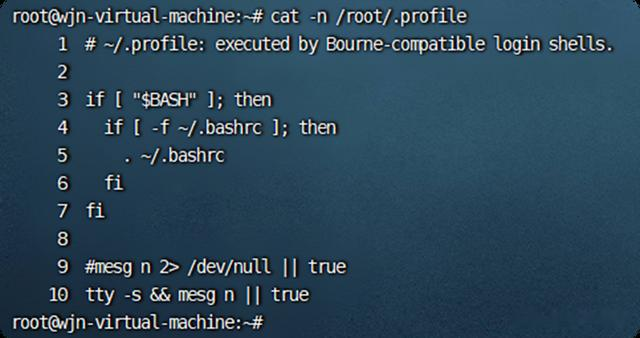
修改 /root/.profile,屏蔽最后一行,并添加一行 tty -s && mesg n || true。