
嗨,大家好,我是徐小夕。
最近 Next-Admin 中后台管理系统已经支持国际化,接下来就和大家分享一下实现国际化的详细方案,方便大家轻松应用到自己的项目。
github地址:https://github.com/MrXujiang/next-admin
演示地址:http://next-admin.com
内容大纲Next-Admin 基本介绍Nextjs 国际化常用方案从零实现 Nextjs 国际化方案Next-Admin 后期规划Next-Admin介绍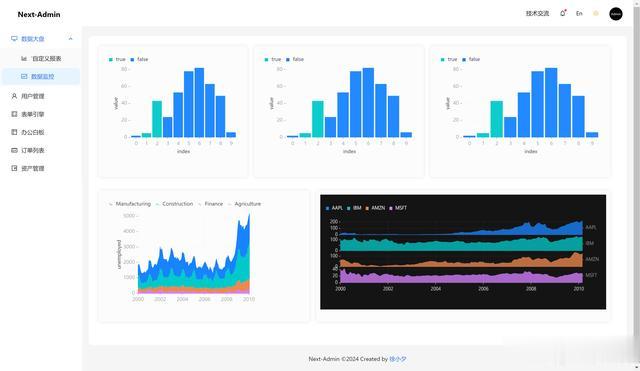
Next-Admin 是一款基于 nextjs最新版 + Antd5.0的开源中后台(同构)系统,我们使用它可以轻松实现前后端同构项目,支持SSR和CSR, 具体特点如下:
Next14.0 + antd5.0支持国际化支持主题切换内置数据可视化报表开箱即用的业务页面模板支持自定义拖拽看板集成办公白板Next全栈最佳实践支持移动端和PC端自适应Nextjs 国际化常用方案
Next.js 的国际化插件有很多,以下是其中一些常用的:
next-i18next: 一款流行的 Next.js 国际化插件,它提供了丰富的功能,包括多语言路由、服务器端渲染和静态生成的支持,以及简单的翻译文件管理。next-intl: 用于 Next.js 的国际化插件,它提供了基于React Intl的国际化解决方案,支持多语言文本和格式化。next-translate: 这个插件为 Next.js 提供了简单的国际化解决方案,支持静态生成和服务器端渲染,并且易于配置和使用。在亲自体验了以上几款插件之后,我选择了 next-intl, 从扩展和使用灵活性上都非常不错, 接下来就和大家分享一下如何使用 next-intl 来实现 Next 项目国际化.
从零实现 Nextjs 国际化方案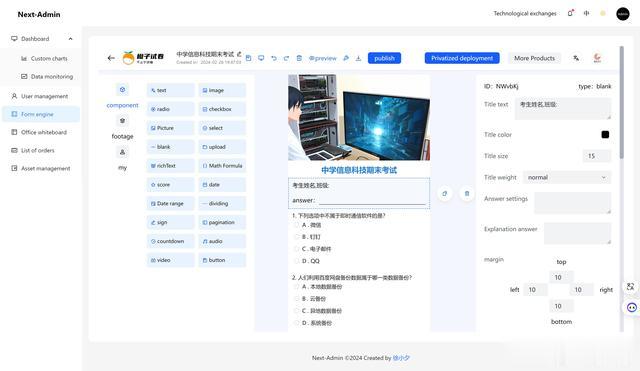 1. 首先我们先安装next-intl :pnpm add next-intl2. 在Nextjs 项目根目录中创建 message 目录, 然后新建语言包文件:# messages- zh.json- en.json
当然如果有其它语言翻译需求, 也可以添加对应的语言文件,这里给大家推荐一个语言名称映射表:
 3. 在 src 下新建 i18n.ts 文件,来配置我们的国际化逻辑。// src/i18n.tsximport {headers} from 'next/headers';import {notFound} from 'next/navigation';import {getRequestConfig} from 'next-intl/server';import {locales} from './navigation';export default getRequestConfig(async ({locale}) => { // Validate that the incoming `locale` parameter is valid if (!locales.includes(locale as any)) notFound(); const now = headers().get('x-now'); const timeZone = headers().get('x-time-zone') ?? 'Europe/Vienna'; const messages = (await import(`../messages/${locale}.json`)).default; return { now: now ? new Date(now) : undefined, timeZone, messages, defaultTranslationValues: { globalString: 'Global string', highlight: (chunks) => <strong>{chunks}</strong> }, formats: { dateTime: { medium: { dateStyle: 'medium', timeStyle: 'short', hour12: false } } }, onError(error) { if ( error.message === (process.env.NODE_ENV === 'production' ? 'MISSING_MESSAGE' : 'MISSING_MESSAGE: Could not resolve `missing` in `Index`.') ) { // Do nothing, this error is triggered on purpose } else { console.error(JSON.stringify(error.message)); } }, getMessageFallback({key, namespace}) { return ( '`getMessageFallback` called for ' + [namespace, key].filter((part) => part != null).join('.') ); } };});
这段逻辑全局配置了 国际化加载的路径,格式化数据的方式,时间等参数,当然还有更多的逻辑处理可以参考 next-intl 文档。
需要补充一下 navigation.tsx 这个文件的内容:
import { createLocalizedPathnamesNavigation, Pathnames } from 'next-intl/navigation'; export const defaultLocale = 'zh'; export const locales = ['en', 'zh'] as const; export const localePrefix = process.env.NEXT_PUBLIC_LOCALE_PREFIX === 'never' ? 'never' : 'as-needed'; export const pathnames = { '/': '/', '/user': '/user', '/dashboard': '/dashboard', // '/nested': { // en: '/next-home', // zh: '/next-zh-home' // }, } satisfies Pathnames<typeof locales>; export const {Link, redirect, usePathname, useRouter} = createLocalizedPathnamesNavigation({ locales, localePrefix, pathnames });上面代码定义了国际化的:
默认语言和语言列表路由映射国际化路径前缀这样我们后面在封装 国际化切换组件的收就会有很好的 ts提示。
4. 配置 next 国际化中间件我们在 src 目录下新建 middleware.ts, 内容如下:
import createMiddleware from 'next-intl/middleware';import {locales, pathnames, localePrefix, defaultLocale} from './navigation';export default createMiddleware({ defaultLocale, localePrefix, pathnames, locales,});export const config = { // Skip all paths that should not be internationalized matcher: ['/((?!_next|.*\\..*).*)']};这样国际化方案就初步完成了。接下来我们来具体看看如何在页面中使用国际化来写文案。
5. 在组件 / 页面中使用i18nnext-intl 的国际化定义支持命名空间,我们可以在messages 对应的语言文件中通过嵌套结构来设置命名空间,有序的管理不同页面的国际化文本:
// zh.json{ "index": { "title": "Next-Admin", "desc": "一款基于NextJS 14.0+ 和 antd5.0 开发的全栈开箱即用的多页面中后台管理解决方案", "log": { "title": "Next-Admin 进程规划", "1": "Next + antd5基础工程方案", "2": "国际化语言支持", "3": "登录注册 / 数据大盘 / 业务列表页面", "4": "图标管理 / 素材管理", "5": "思维导图 / 流程图 / 3D可视化页面", "6": "页面搭建引擎 / 表单引擎", "7": "万维表" }, "try": "立即体验" }, "global": { "technological exchanges": "技术交流", "dashboard": "数据大盘", "customChart": "'自定义报表", "monitor": "数据监控", "userManage": "用户管理", "formEngine": "表单引擎", "board": "办公白板", "orderList": "订单列表", "resource": "资产管理" }, // ...}这样我们就可以这样来使用:
'use client';import { useTranslations } from 'next-intl';export default Page(){ const t = useTranslations('global'); return <div> { t('technological exchanges') } </div>}同样我们还可以给国际化文案中使用动态变量:
// en.json{ "weclome": "Hello {name}!"}// page.tsxt('weclome', {name: 'Next-Admin'}); // "Hello Next-Admin!"官方文档中还介绍了如何使用数学计算,时间日期格式化等功能, 整体来说还是非常强大的。
6. 注意事项由于 next 项目支持客户端渲染和服务端渲染,所以使用 next-intl 的方式也是有区别的,如果我们在页面中出现 next-intl 相关的服务端渲染报错, 可以在页面同级添加 layout.tsx, 然后做如下封装:
import { NextIntlClientProvider, useMessages } from 'next-intl';type Props = { children: React.ReactNode; params: {locale: string};};export default function LocaleLayout({children, params: { locale }}: Props) { // Receive messages provided in `i18n.ts` const messages = useMessages(); return <NextIntlClientProvider locale={locale} messages={messages}> {children} </NextIntlClientProvider> }这样就可以解决报错问题了(本人亲自实验好用)。
同时,这也是基于 nextjs 嵌套布局实现的方案, 为了使用 next-intl, 我们还需要在 next/src/app目录做如下改造:
next-admin\src\app\[locale]也就是加一层[locale] 目录。
好啦, 通过以上的配置我们就可以开心的使用国际化了,全部代码我已经同步到 Next-Admin 仓库了, 大家可以开箱即用。
github地址:https://github.com/MrXujiang/next-admin
演示地址:http://next-admin.com
开源不易, 欢迎 star 更多推荐