为了方便大家学习,我特意出了这样的一期课程,每一天的文章,都有详细的源码和注释,大家着重看注释,讲解会比较少
今天的内容

下面正式开始源码部分,为了方便大家测试,我先发源码图是执行效果图,再发文字源码
三维旋转
源码图

效果图

源码
<!DOCTYPE html>
<html>
<head>
<meta charset="UTF-8">
<title>三维旋转</title>
<style type="text/css">
/*x:左右 y上下 z内外*/
.box1 {
width: 300px;
height: 300px;
float: left;
background-color: gold;
border: 3px solid #000000;
margin: 50px auto;
transform-style: preserve-3d;
/*做变形动画需要设置初始值,否则容易出现bug*/
transform: perspective(800px) rotateY(0deg);
transition: all 500ms ease;
}
.box1:hover {
transform: perspective(800px) rotateY(111deg);
}
.box2 {
width: 300px;
height: 300px;
float: left;
margin: 50px auto;
background-color: green;
border: 3px solid red;
transform-style: preserve-3d;
transform: perspective(800px) rotateX(0deg);
border-radius: 50%;
/*时间*/
transition: all 500ms ease;
}
.box2:hover {
transform: perspective(800px) rotateX(45deg);
}
.box3 {
width: 300px;
height: 300px;
float: left;
margin: 50px auto;
background-color: black;
border: 3px solid red;
transform-style: preserve-3d;
transform: perspective(800px) rotateX(0deg);
border-radius: 50%;
/*时间*/
transition: all 500ms ease;
}
.box3:hover {
transform: perspective(800px) rotateX(45deg);
}
.box4 {
width: 300px;
height: 300px;
float: left;
margin: 50px auto;
background-color: blueviolet;
border: 3px solid red;
transform-style: preserve-3d;
transform: perspective(800px) rotateZ(0deg);
border-radius: 50% 0;
/*时间*/
transition: all 500ms ease;
}
.box4:hover {
transform: perspective(800px) rotateZ(55deg);
}
.box5 {
width: 300px;
height: 300px;
float: left;
margin: 50px auto;
background-color: yellowgreen;
border: 3px solid red;
transform-style: preserve-3d;
transform: perspective(800px) rotate3d(0,0,0,0deg);
border-radius: 50% 0;
/*时间*/
transition: all 500ms ease;
}
.box5:hover {
transform: perspective(800px) rotate3d(55,55,55,55deg);
}
</style>
</head>
<body>
<div></div>
<div></div>
<div></div>
<div></div>
<div></div>
</body>
</html>
图片翻转动画
源码图

效果图

源码
<!DOCTYPE html>
<html>
<head>
<meta charset="UTF-8">
<title>图片翻转动画</title>
<style type="text/css">
.box{
width: 700px;
height: 272px;
border: 3px solid black;
margin: 50px auto 0;
position: relative;
/*3d空间显示*/
transform-style: preserve-3d;
}
.box img{
position: absolute;
left: 200px;
top: 0;
transform: perspective(800px) rotateY(0deg);
transition: all 500ms ease;
/*旋转的时候不可见*/
backface-visibility: hidden;
}
.box:hover img{
transform: perspective(800px) rotateY(180deg);
}
.box .back{
width: 300px;
height: 272px;
background-color: pink;
position: absolute;
/*设置文字居中显示*/
line-height: 272px;
/*与图片的偏移值一样*/
left: 200px;
top: 0;
font-size: 20px;
text-align: center;
/*起始角度为-180 这样就不可见了*/
transform: perspective(800px) rotateY(-180deg);
transition: all 500ms ease;
backface-visibility: hidden;
}
.box:hover .back{
transform: perspective(800px) rotateY(0deg);
}
</style>
</head>
<body>
<div>
<img src="images/location_bg.jpg" alt="背景图">
<div>基本的翻转图片动画</div>
</div>
</body>
</html>
风车动画
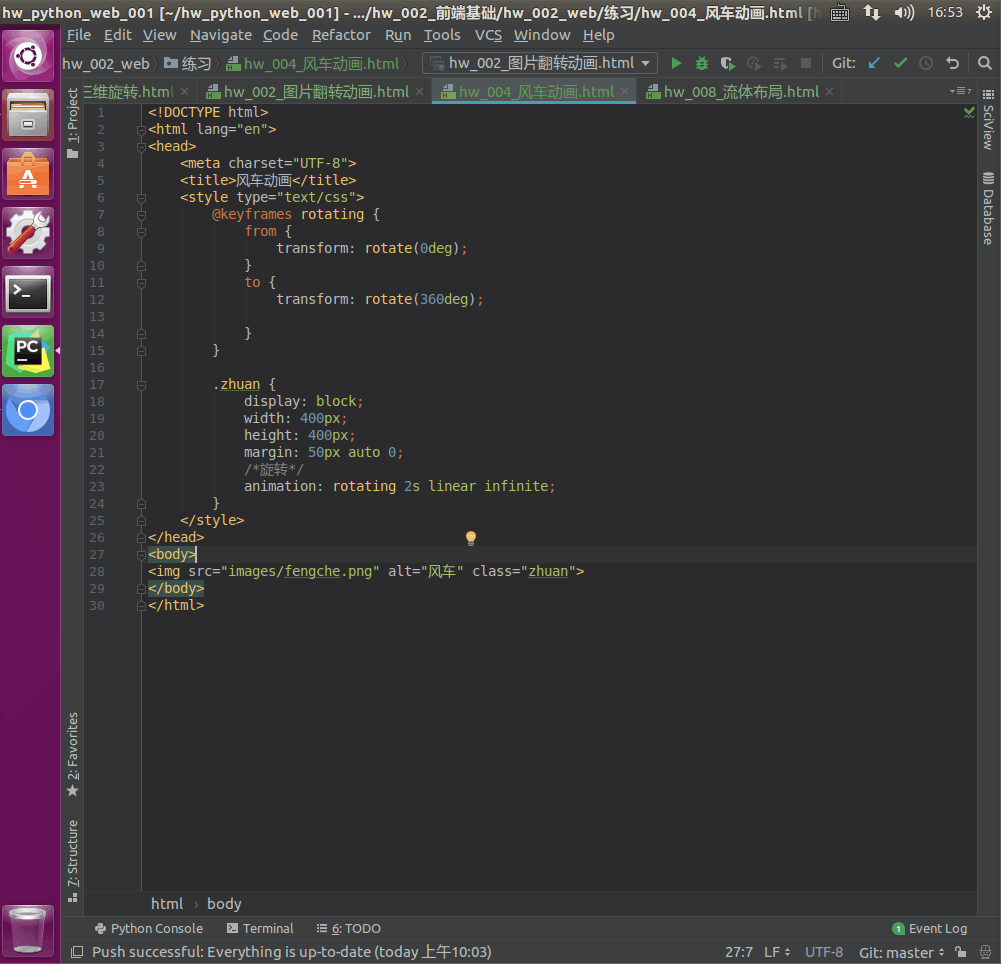
源码图

效果图

源码
<!DOCTYPE html>
<html>
<head>
<meta charset="UTF-8">
<title>风车动画</title>
<style type="text/css">
@keyframes rotating {
from {
transform: rotate(0deg);
}
to {
transform: rotate(360deg);
}
}
.zhuan {
display: block;
width: 400px;
height: 400px;
margin: 50px auto 0;
/*旋转*/
animation: rotating 2s linear infinite;
}
</style>
</head>
<body>
<img src="images/fengche.png" alt="风车">
</body>
</html>
移动和旋转动画
源码图

效果图

源码
<!DOCTYPE html>
<html>
<head>
<meta charset="UTF-8">
<title>移动和旋转动画</title>
<style type="text/css">
@keyframes moving {
from {
width: 100px;
}
to {
width: 500px;
}
/*按时间百分比添加动画效果*/
0% {
background: red;
}
25% {
background: yellow;
}
50% {
background: blue;
}
100% {
background: green;
}
}
@keyframes rotating {
from {
transform: rotate(0deg);
}
to {
transform: rotate(360deg);
}
/*按时间百分比添加动画效果*/
0% {
background: red;
}
25% {
background: yellow;
}
50% {
background: blue;
}
100% {
background: green;
}
}
body {
transform-style: preserve-3d;
}
.box1 {
width: 100px;
height: 100px;
float: left;
margin: 50px auto;
background-color: black;
border: 1px solid red;
/*动画*/
animation: moving 1s ease infinite alternate;
}
.box2 {
width: 100px;
height: 500px;
/*float: left;*/
margin: 50px auto;
background-color: black;
border: 1px solid red;
/*3d*/
/*动画*/
animation: rotating 2s ease infinite alternate;
}
</style>
</head>
<body>
<div></div>
<div></div>
</body>
</html>
加载动画
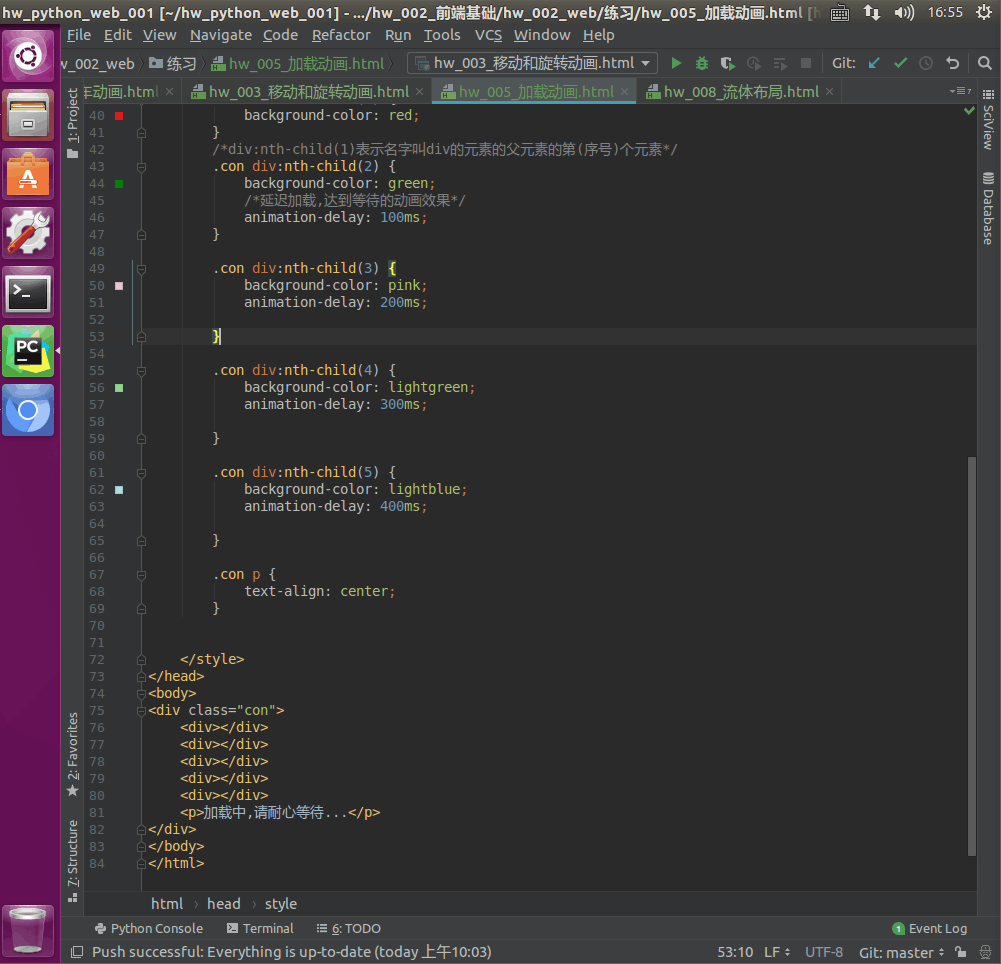
源码图

效果图

源码
<!DOCTYPE html>
<html>
<head>
<meta charset="UTF-8">
<title>加载动画</title>
<style type="text/css">
@keyframes loading {
from {
/*css3的缩放动画 初始为1*/
transform: scale(1, 1);
}
to {
/*0.5表示高度只有一半*/
transform: scale(1, 0.5);
}
}
.con {
/*设置加载动画整体盒子的大小*/
width: 300px;
height: 158px;
/*让盒子居中显示*/
margin: 20% auto 0;
}
.con div {
width: 30px;
height: 100px;
float: left;
background-color: gold;
margin: 15px;
/*设置圆角,让动画更圆滑*/
border-radius: 15px;
/*设置动画,并设置为无限循环,播放时间为500毫秒*/
animation: loading 500ms ease infinite alternate;
}
/*利用css3的快速同类选择器设置动画,优化代码*/
.con div:nth-child(1) {
background-color: red;
}
/*div:nth-child(1)表示名字叫div的元素的父元素的第(序号)个元素*/
.con div:nth-child(2) {
background-color: green;
/*延迟加载,达到等待的动画效果*/
animation-delay: 100ms;
}
.con div:nth-child(3) {
background-color: pink;
animation-delay: 200ms;
}
.con div:nth-child(4) {
background-color: lightgreen;
animation-delay: 300ms;
}
.con div:nth-child(5) {
background-color: lightblue;
animation-delay: 400ms;
}
.con p {
text-align: center;
}
</style>
</head>
<body>
<div>
<div></div>
<div></div>
<div></div>
<div></div>
<div></div>
<p>加载中,请耐心等待...</p>
</div>
</body>
</html>
retina屏幕适配
源码图

效果图

源码
<!DOCTYPE html>
<html>
<head>
<meta charset="UTF-8">
<meta name="viewport" content="width=device-width, initial-scale=1.0">
<title>retina屏幕适配</title>
<style type="text/css">
/*所谓适配,就是将原本的宽高调整为原来的一半*/
.shipei {
width: 300px;
height: 215px;
}
</style>
</head>
<body>
<img src="images/pic1x.jpg" alt="">
<img src="images/pic2x.jpg" alt="">
</body>
</html>
背景图尺寸设置
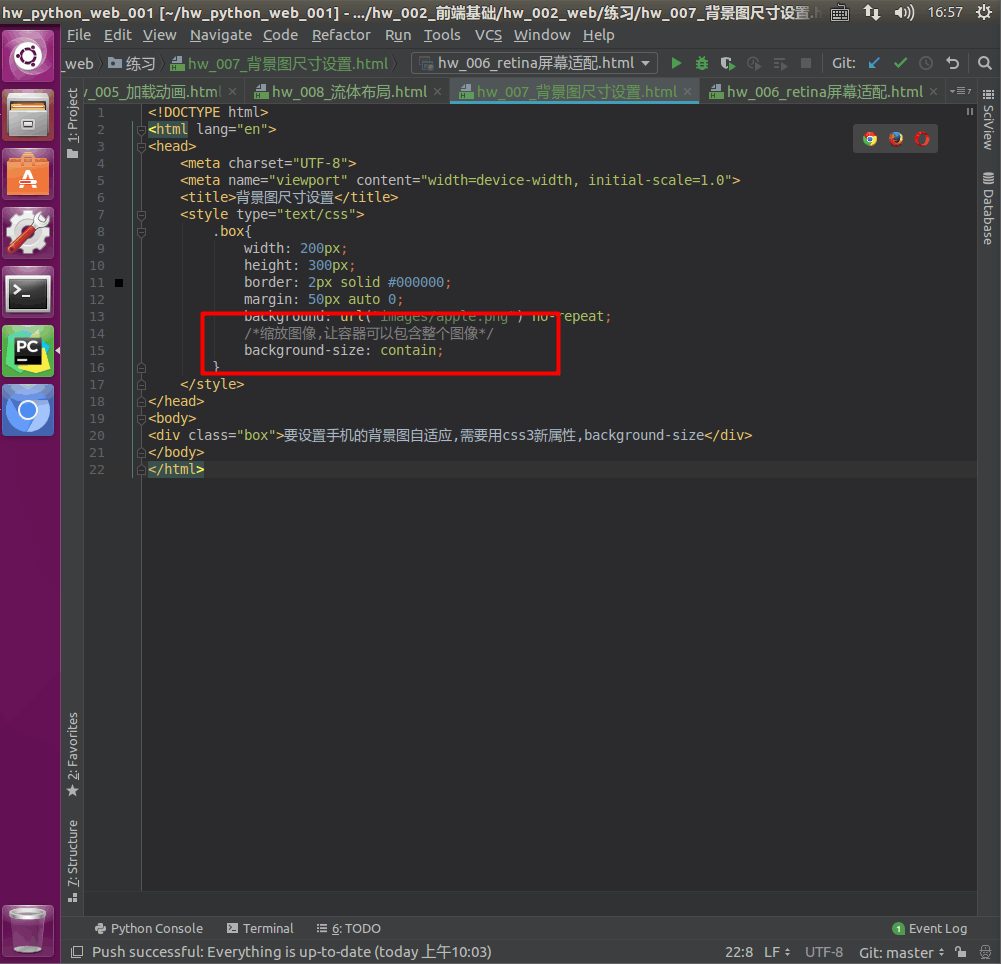
源码图

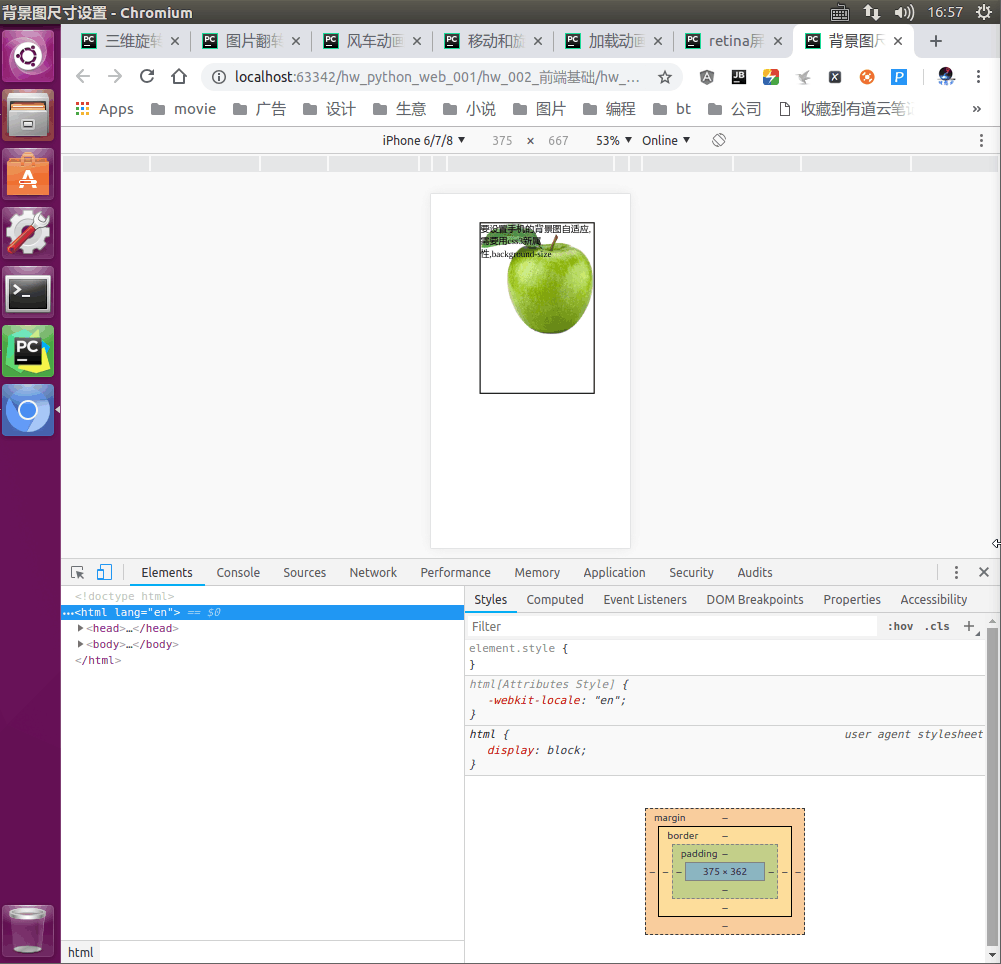
效果图

源码
<!DOCTYPE html>
<html>
<head>
<meta charset="UTF-8">
<meta name="viewport" content="width=device-width, initial-scale=1.0">
<title>背景图尺寸设置</title>
<style type="text/css">
.box {
width: 200px;
height: 300px;
border: 2px solid #000000;
margin: 50px auto 0;
background: url("images/apple.png") no-repeat;
/*缩放图像,让容器可以包含整个图像*/
background-size: contain;
}
</style>
</head>
<body>
<div>要设置手机的背景图自适应,需要用css3新属性,background-size</div>
</body>
</html>
流体布局
源码图

效果图


源码
<!DOCTYPE html>
<html>
<head>
<meta charset="UTF-8">
<meta name="viewport" content="width=device-width, initial-scale=1.0">
<title>流体布局</title>
<style type="text/css">
body {
margin: 0;
padding: 0;
}
.con a {
display: block;
/*所谓流体布局,就是讲宽度按百分比设置*/
width: 25%;
height: 100px;
background-color: #f0f0f0;
text-align: center;
line-height: 100px;
float: left;
text-decoration: none;
color: #333333;
font-size: 14px;
border: 2px solid #000000;
/*解决因为边框导致的流体溢出*/
box-sizing: border-box;
}
</style>
</head>
<body>
<div><a href="">理想国真惠玩</a><a href="">理想国真惠玩</a><a href="">理想国真惠玩</a><a
href="">理想国真惠玩</a>
</div>
</body>
</html>
响应式布局
源码图

效果图


源码
<!DOCTYPE html>
<html>
<head>
<meta charset="UTF-8">
<meta name="viewport" content="width=device-width, initial-scale=1.0">
<title>响应式布局</title>
<style type="text/css">
body {
margin: 0;
padding: 0;
}
.con div {
width: 23%;
background-color: #9f9f9f;
border: 2px solid #000000;
height: 200px;
margin: 1%;
float: left;
box-sizing: border-box;
}
/*所谓响应式布局,就是利用媒体查询来检测屏幕宽度,自适应*/
@media (max-width: 800px) {
.con div {
width: 46%;
margin: 2%;
}
}
@media (max-width: 400px) {
.con div {
width: 94%;
margin: 3%;
}
}
</style>
</head>
<body>
<div>
<div>1</div>
<div>2</div>
<div>3</div>
<div>4</div>
</div>
</body>
</html>
希望对您有用~~~
